 Save to Pinterest
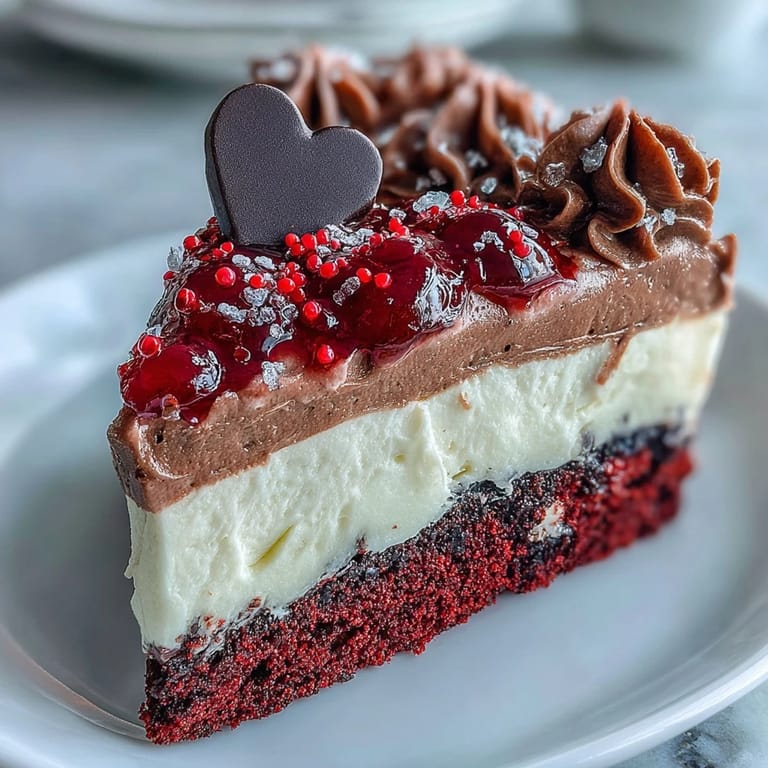
 The first time I attempted a heart-shaped cake for Valentine's Day, I ended up with two lopsided blobs that barely resembled hearts at all. My daughter tried so hard to be supportive, suggesting they looked like 'artistic interpretations of love,' which just made us both dissolve into giggles. That kitchen disaster taught me everything about patience and precision, but also that the best celebrations come from wildly imperfect attempts. This red velvet beauty became my redemption story years later.
I made this cake for my best friend's engagement party last winter, watched her face light up when she saw Betty Boop winking back at her from the dessert table. She'd collected Betty memorabilia since college, something I'd nearly forgotten until that moment. The silhouette cracked slightly during transfer—my hands were shaking a little—but she insisted the tiny flaw made it more perfect. Sometimes the mistakes become the memories you actually keep.
Ingredients
- Cake flour (2 ½ cups sifted): Lower protein creates that tender velvety crumb red velvet is famous for, worth seeking out specifically
- Natural cocoa powder (2 tablespoons): Just enough to give depth without overpowering that classic red color
- Baking powder and soda: The chemical dance that gives this cake its signature lightness and rise
- Fine sea salt (½ teaspoon): Enhances chocolate and balances sweetness—never skip salt in baking
- Unsalted butter (1 cup room temperature): Temperature matters completely here for proper creaming and aeration
- Granulated sugar (1 ¾ cups): Creates structure and that delicate tender crumb through creaming method
- Large eggs (4 room temperature): Room temp eggs emulsify better into the batter for consistent texture
- Buttermilk (1 cup room temperature): The acid activates the baking soda and creates that signature red velvet tang
- Red gel food coloring (2 tablespoons): Gel delivers intense color without thinning your batter like liquid would
- Pure vanilla extract (2 teaspoons): Don't use imitation—the real thing makes all the difference in flavor
- White vinegar (1 teaspoon + 1 teaspoon): One goes in the batter, one activates baking soda for extra lift
- Cream cheese (1 cup room temperature): Full fat and properly soft prevents grainy frosting disasters
- Powdered sugar (4 cups sifted): Sifting first prevents those dreaded lumpy frosting moments
- Dark chocolate (6 oz): The dramatic contrast that makes Betty pop against that red velvet backdrop
Tired of Takeout? 🥡
Get 10 meals you can make faster than delivery arrives. Seriously.
One email. No spam. Unsubscribe anytime.
Instructions
- Prep your pans and preheat:
- Preheat oven to 350°F (175°C). Grease two 9-inch heart-shaped cake pans thoroughly, line bottoms with parchment circles, then grease again—red velvet sticks stubbornly.
- Whisk the dry ingredients:
- In a medium bowl, sift together cake flour, cocoa powder, baking powder, baking soda, and sea salt. Set aside while you cream the butter.
- Cream butter and sugar:
- Beat butter on medium speed for 1 minute until creamy. Gradually add sugar, continue beating 2–3 minutes until mixture looks pale and fluffy—this creates the tender crumb.
- Add eggs one at a time:
- Add eggs individually, beating on low just until blended after each. Scrape down bowl sides frequently so everything incorporates evenly.
- Build the red color:
- Stir in red gel coloring, vanilla extract, and first teaspoon of white vinegar until batter turns that impossible vibrant red everyone expects.
- Alternate wet and dry:
- Mix on low speed, adding dry ingredients and buttermilk in thirds: dry-wet-dry-wet-dry. Stop immediately after last addition—overmixing makes tough cake.
- Activate with vinegar:
- Mix remaining vinegar with baking soda in a small cup. Fold gently into batter, watching it foam slightly—that's your lift working.
- Bake until done:
- Divide batter evenly between prepared pans, smooth tops. Bake 25–30 minutes until toothpick comes out clean or with just a few moist crumbs.
- Cool completely:
- Let cakes cool in pans 10 minutes, run knife around edges, invert onto wire racks. Remove parchment and cool completely before frosting—warm cake melts frosting into slides.
- Make the frosting:
- Beat cream cheese and butter 2 minutes until smooth. Gradually add powdered sugar and salt, then vanilla, beating until fluffy. Don't overbeat or it gets too soft.
- Stack and crumb coat:
- Level domes if needed. Place first layer, spread ¾ cup frosting. Top with second layer, press gently, refrigerate 15 minutes. Apply thin crumb coat, chill again.
- Final coat:
- Add final smooth frosting layer. Use offset spatula for swirls or glass-smooth finish—your preference, both look stunning.
- Create Betty silhouette:
- Place stencil under parchment paper. Pipe or brush melted dark chocolate over outline, filling completely. Let set at room temperature or refrigerate 10 minutes.
- Apply chocolate art:
- Carefully peel chocolate silhouette from parchment. Center on cake and press gently—it adheres beautifully to that cream cheese frosting.
- Final touches:
- Add frosting rosettes, edible glitter, or red sugar pearls around edges if desired. Chill 30 minutes to set. Slice with warm knife for clean heart shapes.
 Save to Pinterest
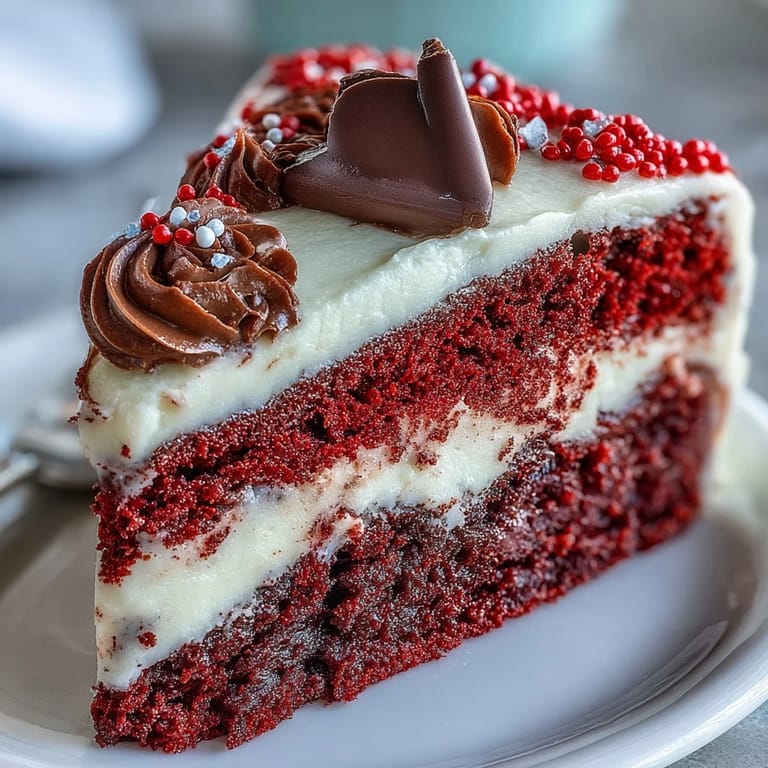
 This cake has become my go-to for celebrations that need something playful yet sophisticated. Last Valentine's, my partner actually proposed over slices of it, with Betty watching from the center like our tiny chocolate witness. Now it's not just dessert—it's part of our story.
Getting That Perfect Red
Gel food coloring is absolutely worth the extra effort and cost. Liquid coloring thins your batter and affects texture, while gel delivers that impossible red without changing your recipe's chemistry at all. Start with less than you think—you can always add more, but you can't take it back once it's mixed in.
Working With Chocolate Silhouettes
Make your chocolate decorations the day before if possible—they actually get sturdier with time and are less likely to crack during transfer. If you're nervous about free-hand piping Betty's face, print a simple silhouette to trace underneath your parchment paper. The chocolate peels away easiest when it's completely set but still slightly flexible.
Making It Your Own
This cake takes beautifully to personal touches, whether you switch the silhouette shape or play with flavors. I've made versions with different characters, initials, even wedding dates piped in chocolate. The red velvet base remains constant, but the top decoration makes each one feel specific to its occasion.
- Try white chocolate tinted black if you want sharper contrast than dark chocolate provides
- Add mini chocolate hearts around the base instead of rosettes for a simpler look
- The silhouette technique works with any shape—stars, letters, numbers, whatever feels meaningful to you
 Save to Pinterest
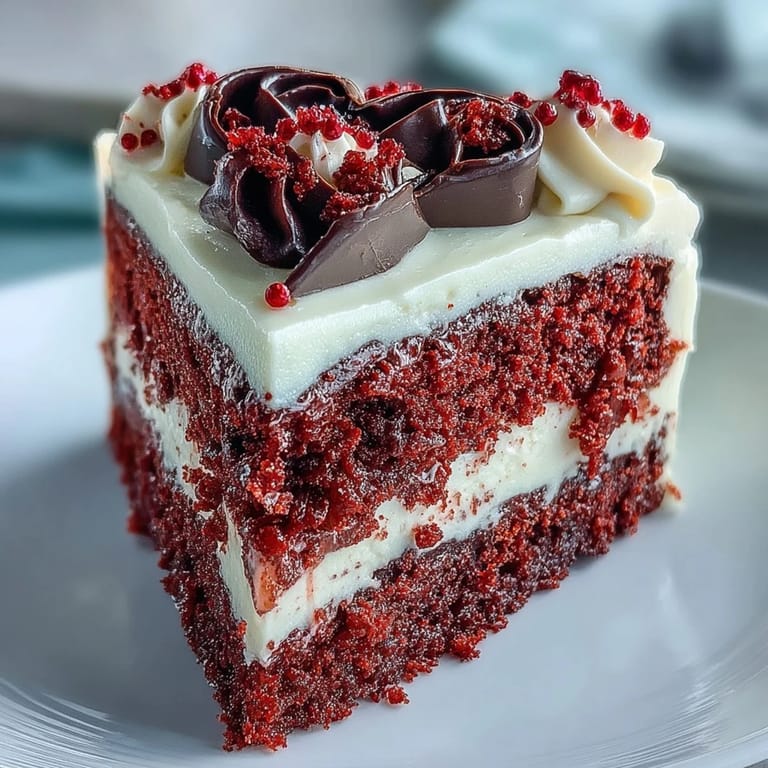
 There's something genuinely joyful about cutting into that red velvet and revealing Betty's dark chocolate silhouette waiting inside. Every slice feels like a little surprise.
Recipe Questions
- → What makes the crumb so tender and moist?
The combination of buttermilk, room-temperature ingredients, and the vinegar-baking soda reaction creates a light, airy crumb. The acidic components also help tenderize the gluten structure, resulting in a softer texture.
- → Can I make the Betty Boop silhouette ahead of time?
Yes, prepare the chocolate silhouettes up to a week in advance. Store them flat between parchment paper in an airtight container at room temperature or in the refrigerator. Handle gently when placing them on the finished cake.
- → Why use gel food coloring instead of liquid?
Gel coloring delivers vibrant red hue without adding excess liquid that could alter the batter consistency. Liquid food coloring requires more product to achieve the same intensity, which can affect the final texture and rise.
- → How should I store the finished heart cake?
Keep the cake refrigerated due to the cream cheese frosting. Cover loosely with plastic wrap or place in a cake container to prevent drying. Bring to room temperature for 20 minutes before serving for the softest texture and best flavor.
- → Can I substitute the dark chocolate decoration?
White chocolate tinted with oil-based black coloring works well for a brighter graphic contrast. Alternatively, create the silhouette using chocolate modeling clay, fondant, or even piped royal icing for different texture and appearance options.