 Save to Pinterest
 The first time I attempted a character cake, my kitchen looked like a craft room explosion. Black fondant dusted every surface, and I spent forty minutes trying to get the eyelashes just right. But when I brought that Betty Boop cake to my friend's 1940s themed birthday party, something magical happened. Gathers of guests crowded around it with phones out before anyone even took a bite. That's when I understood that sometimes food is equal parts art and comfort.
I made this again for my niece who grew up watching classic cartoons with her grandmother. She teared up when she saw it, telling me it reminded her of weekend mornings spent curled up on the couch together. Food has this incredible power to bridge generations and trigger memories we did not know we were holding onto.
Ingredients
- All purpose flour: Provides the structure for those tall proud layers that stack without collapsing under their own weight
- Granulated sugar: Sweetens while creating that tender velvet texture we love in classic red cakes
- Baking powder: Gives the lift needed for airy layers instead of dense hockey pucks
- Salt: Balances sweetness and enhances overall flavor depth
- Unsalted butter: Room temperature butter creates the perfect creamy base for both cake and frosting
- Large eggs: Bind everything together while adding richness and structure
- Whole milk: Contributes moisture and fat for that tender melt in your mouth crumb
- Vanilla extract: Rounds out the flavor with warm aromatic notes
- Red gel food coloring: Gel delivers that deep dramatic red without adding excess liquid or altering texture
- Cream cheese: Brings the signature tang that cuts through sweetness and creates the perfect frosting balance
- Powdered sugar: Sweetens and thickens the buttercream while creating silky smooth texture
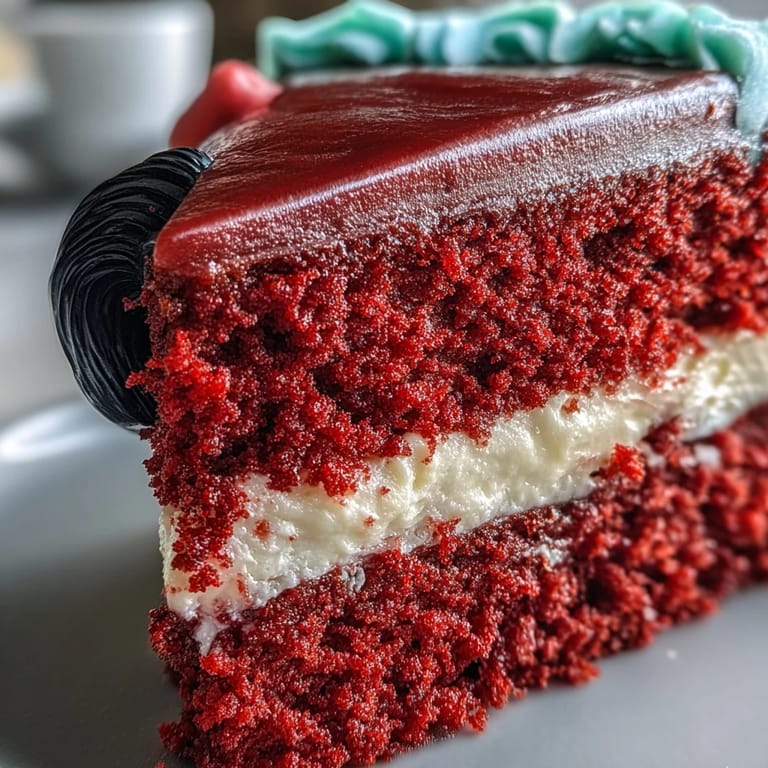
- Black fondant: Essential for creating that iconic Betty Boop silhouette that makes the design instantly recognizable
- White fondant: Forms the expressive eyes that give the cake its animated personality
- Red fondant: Creates those classic lips that pop against the monochrome design
- Edible pearl dust: Adds subtle shimmer that catches light and makes the design feel polished and professional
Tired of Takeout? 🥡
Get 10 meals you can make faster than delivery arrives. Seriously.
One email. No spam. Unsubscribe anytime.
Instructions
- Prep your pans and warm the oven:
- Preheat oven to 350°F (175°C) and grease two 8 inch round cake pans before lining with parchment paper for easy release later.
- Whisk the dry ingredients:
- In a medium bowl combine flour baking powder and salt then set aside while you work on the wet ingredients.
- Cream butter and sugar:
- Beat butter and sugar on medium speed with an electric mixer for about 3 minutes until the mixture turns light and fluffy like whipped cream.
- Add eggs and vanilla:
- Drop in eggs one at a time beating thoroughly after each addition then stir in vanilla extract until fully incorporated.
- Combine wet and dry:
- Reduce mixer speed to low and alternate adding flour mixture and milk in three portions starting and ending with flour while scraping down the bowl occasionally.
- Add that signature red color:
- Mix in red gel food coloring until the batter transforms into a uniform deep ruby red that looks striking against the white bowl.
- Bake the layers:
- Divide batter evenly between prepared pans smooth the tops and bake for 25 to 30 minutes until a toothpick comes out clean rotating pans halfway through.
- Cool completely:
- Let cakes rest in pans for 10 minutes then invert onto wire racks to cool entirely before touching them again.
- Make the buttercream:
- Beat cream cheese and butter together on medium speed until smooth then gradually add powdered sugar until fluffy and spreadable.
- Assemble the cake:
- Trim domes level with a serrated knife then stack layers with buttercream between them applying a thin crumb coat and chilling for 20 minutes.
- Apply final frosting:
- Add a thick final coat of buttercream smoothing sides and top with a cake scraper until glassy and even.
- Create the fondant decorations:
- Dust your work surface with cornstarch roll black fondant to 1/8 inch thickness and cut out the signature hair silhouette using a template or freehand.
- Form facial features:
- Roll white fondant into circles for eyes with tiny heart highlights then cut red lips from red fondant adding pearl dust for extra dimension.
- Attach decorations to cake:
- Gently drape the black fondant hair over the front of the chilled cake using dabs of buttercream to secure white eyes and red lips in place.
- Add final details:
- Pipe or cut black fondant eyelashes and eyebrows positioning them carefully around the eyes then add a red fondant headband if desired.
- Rest before serving:
- Let the decorated cake sit at room temperature for 30 minutes so flavors settle and fondant softens slightly for easier slicing.
 Save to Pinterest
 My sister in law still talks about the Betty Boop cake I made for her vintage Hollywood themed baby shower. She kept asking me how I got the eyelashes so perfect and had to laugh when I admitted I had practiced on wax paper three times the night before. Some of the best kitchen moments happen in those quiet practice rounds where no one is watching.
Getting The Fondant Just Right
Working with fondant can feel intimidating at first especially when you are trying to create recognizable shapes. I have found that keeping cornstarch handy prevents sticking and rolling to an even 1/8 inch thickness gives you structural stability without making the decorations too heavy or Chewy. If the fondant feels dry or cracked work a tiny bit of vegetable shortening into it to restore pliability.
Color Confidence
That deep red cake color takes more gel coloring than most recipes lead you to believe. I start with one tablespoon then add by the half teaspoon until I reach that classic ruby shade that photographs so beautifully. Just remember that the color bakes up slightly lighter so going a shade darker than you think is usually the right call.
Storage And Serving Strategy
This cake actually tastes better on day two when the flavors have melded and the crumb has absorbed some moisture from the frosting. Store it loosely covered at room temperature if you plan to serve within 24 hours otherwise refrigerate and bring to room temperature for two hours before serving. The fondant decorations can be made a day in advance and stored flat between parchment paper to save you time on decorating day.
- Slice with a sharp knife dipped in hot water and wiped clean between cuts for those picture perfect wedges
- Any leftover buttercream freezes beautifully for up to three months if you find yourself with extra
- Room temperature frosting spreads more smoothly so take the chill off before applying that final coat
 Save to Pinterest
 There is something genuinely delightful about cutting into a cake that makes people smile before they even take a bite. This one brings that special kind of joy.
Recipe Questions
- → Can I make this ahead of time?
Yes, bake the red velvet layers up to two days in advance. Wrap cooled cakes tightly in plastic and store at room temperature. Prepare fondant decorations the day before and keep in an airtight container. Assemble and frost within 24 hours of serving for best results.
- → Do I need fondant experience?
Basic fondant handling helps achieve smooth decorations. Work quickly as fondant dries out, and keep cornstarch handy to prevent sticking. If you're new to fondant, practice cutting simple shapes first. Betty Boop's silhouette features mostly curves and circles, which are forgiving for beginners.
- → Can I use store-bought fondant?
Absolutely. Store-bought fondant works perfectly for this project and saves preparation time. Black, white, and red fondant are widely available at craft stores and baking supply shops. Knead it briefly before rolling to ensure smooth, pliable results.
- → How do I get deep red color?
Use gel food coloring rather than liquid for vibrant red without thinning the batter. Start with one tablespoon and add more as needed—gel concentrates deliver intense color. The shade deepens slightly during baking, so aim for rich red before the oven.
- → What if I don't have 8-inch pans?
Two 9-inch rounds work as well—adjust baking time to 22–25 minutes since layers bake thinner. For three 6-inch pans, reduce baking to 18–22 minutes. The total yield remains similar, just check for doneness with a toothpick in the center.
- → Can I substitute the cream cheese frosting?
Swiss meringue buttercream offers a lighter, silkier alternative that pipes beautifully. Traditional American buttercream works too but lacks the tangy contrast that balances sweet red velvet. Whatever frosting you choose, ensure it's firm enough to support fondant details.