 Save to Pinterest
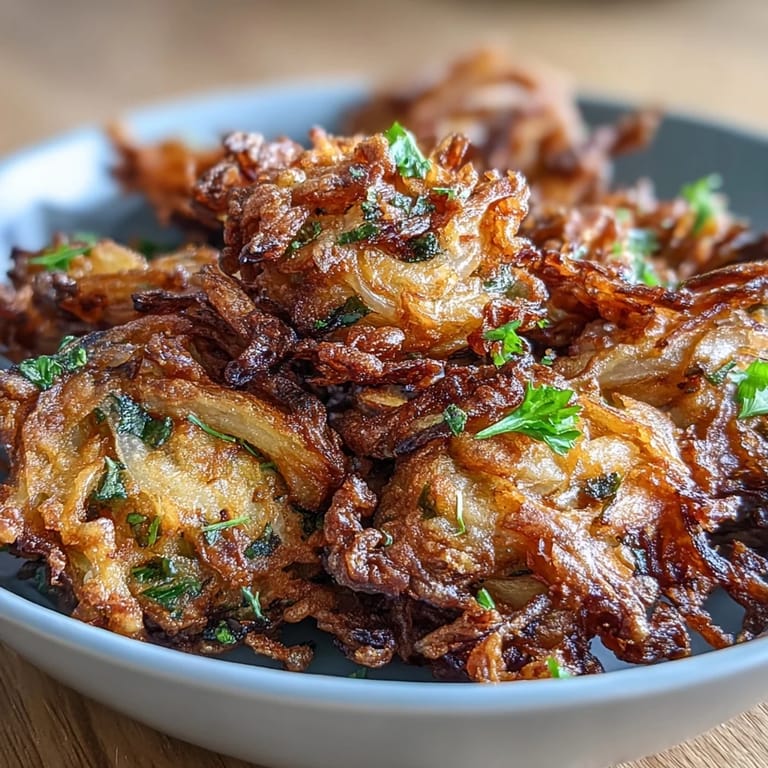
 My cousin called me one Tuesday afternoon asking if I could make bhaji for her daughter's school potluck, but she wanted them less greasy than the traditional deep-fried version. I'd just bought an air fryer and hadn't really trusted it for anything beyond reheating leftovers, so this felt like the perfect challenge. What started as a favor turned into the most satisfying kitchen experiment—crispy, golden, and somehow even more flavorful than I remembered from street vendor visits years ago.
That school potluck day, I watched these bhaji disappear faster than anything else on the table, and a dad I'd never met before asked for my recipe right there in front of the dessert table. His kids had gone back for thirds, which felt like the highest compliment possible from the picky eater crowd.
Ingredients
- Onions (2 large, thinly sliced): The star ingredient that becomes sweet and caramelized as it fries; slicing them thin means they cook through evenly and create those delicate crispy bits.
- Gram flour (1 cup): This chickpea flour binds everything together and gives bhaji their signature earthy flavor and tender-crispy texture that regular wheat flour can't match.
- Rice flour (2 tablespoons): A small amount adds extra crunch without making the batter heavy or dense.
- Green chilies (2, finely chopped): Fresh heat that builds gradually rather than shocking your palate; you can leave them out entirely if spice isn't your thing.
- Fresh cilantro (2 tablespoons, chopped): This brightens everything up with a fresh note that balances the warm spices beautifully.
- Cumin and coriander (1 teaspoon each): These two spices are the backbone of authentic bhaji flavor, warming and slightly floral without overpowering.
- Turmeric (1/2 teaspoon): Besides the golden color, it brings subtle earthiness and mild anti-inflammatory warmth.
- Chili powder (1/2 teaspoon): A touch of deep heat that layers underneath the fresher spice from the green chilies.
- Baking powder (1/2 teaspoon): This might seem small, but it's essential for creating those airy pockets that make them crispy rather than dense.
- Lemon juice (1 tablespoon): The acid keeps everything tasting bright and prevents the spices from feeling flat or heavy.
- Spray oil: Using oil spray instead of pouring oil saves calories while still achieving that golden, crispy exterior the air fryer does so well.
Tired of Takeout? 🥡
Get 10 meals you can make faster than delivery arrives. Seriously.
One email. No spam. Unsubscribe anytime.
Instructions
- Slice and prep your aromatics:
- Take your onions and slice them into thin half-moons so they're all roughly the same thickness. Finely chop your green chilies and cilantro, keeping them separate for now so you can adjust amounts as you go.
- Build your dry mixture:
- In a large bowl, combine gram flour, rice flour, cumin, coriander, turmeric, chili powder, baking powder, salt, and black pepper. I like to whisk this together first so the spices distribute evenly and you don't get any pockets of too much turmeric.
- Coat the onions:
- Add your sliced onions, green chilies, and cilantro to the spiced flour and toss everything together with your hands or a spoon until every piece of onion is coated in that spice mixture. This is important because you want flavor in every bite, not just on the outside.
- Create your batter:
- Squeeze in the lemon juice, then add 2 tablespoons of water and mix gently with your hands, pressing a little as you go. You're looking for a thick, sticky consistency that barely holds together when you squeeze it—add water just a teaspoon at a time if it feels too dry.
- Prep your air fryer:
- Preheat to 180°C (350°F) for a full 3 minutes so it's truly hot. Lightly spray the basket with oil, creating a thin coating that helps prevent sticking without soaking the basket.
- Shape and arrange:
- Using a heaped tablespoon, scoop the mixture and gently shape it into rough patties or clumps with your hands. Arrange them in a single layer in the basket with a little space around each piece—overcrowding means they steam instead of crisping.
- The first spray:
- Lightly spray the tops of each bhaji with oil from about six inches away, using short bursts. This seems like such a small step, but it's what creates that golden, crispy exterior.
- Air fry with attention:
- Set the timer for 12 to 15 minutes, depending on your air fryer's personality. At the halfway mark, gently shake the basket or flip each piece with tongs, then spray again lightly. They should be turning golden at this point.
- Finish strong:
- They're done when they're deeply golden and feel crispy when you tap them with a fork. Serve immediately while they're at their crispiest.
 Save to Pinterest
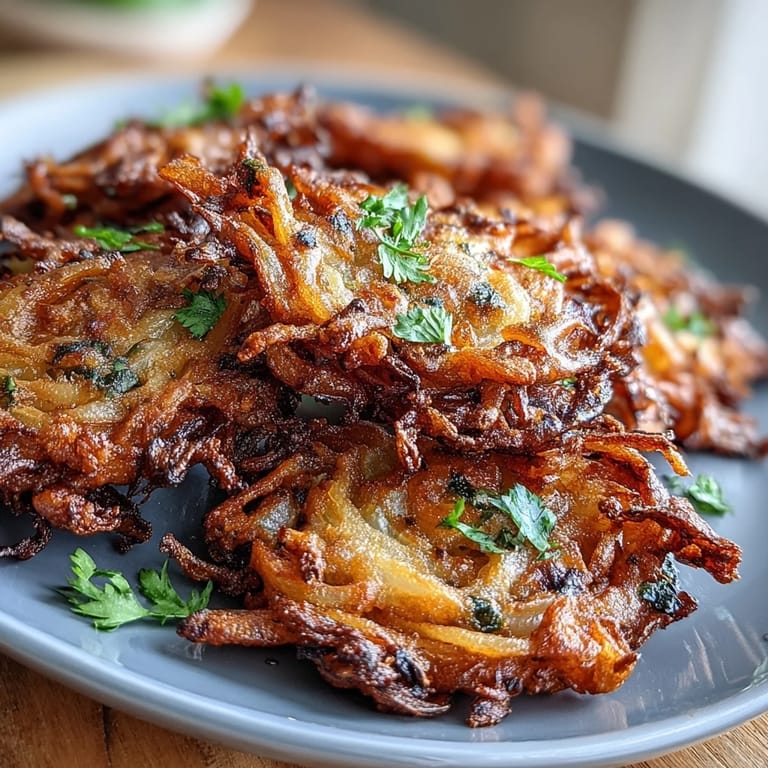
 A few weeks after that potluck, I made these again for myself on a quiet evening when I just wanted something satisfying without making a mess of my kitchen. There's something about biting into one while it's still warm and hearing that crunch, knowing it took no real effort and barely any oil—it felt like I'd discovered a secret that should've been obvious all along.
Why the Air Fryer Changes Everything
The traditional deep-fried bhaji I grew up with were incredible, but they required heating a pot of oil, dealing with splatters, and the inevitable heavy feeling afterward. With the air fryer, you get all the crispy texture with about a quarter of the oil, and your kitchen doesn't smell like a fried food stand for three days. The circulating hot air does something almost magical to the gram flour batter, creating these delicate, shattering edges while keeping the inside tender with those caramelized onion pockets still intact.
Customizing Your Batch
Once you've made these a time or two, you'll start seeing them as a template you can play with based on what you have and what mood you're in. I've added finely shredded carrot for sweetness, thinned spinach for earthiness, and even a pinch of amchur powder for extra tanginess. The base ratio stays the same, so it's really hard to go wrong once you understand how the batter should feel and look.
Serving and Storage Tips
These are absolutely best eaten fresh and warm right from the air fryer, but I've learned they'll keep in an airtight container in the fridge for up to three days if you need to make them ahead. To reheat without losing the crispness, pop them back in the air fryer at 150°C for about 5 minutes rather than using a microwave.
- Serve with mint chutney, tamarind sauce, or even a cooling yogurt dip to balance the spices.
- If you're making these for a crowd, you can prepare the batter earlier in the day and air fry them in batches right before serving.
- Don't be afraid to adjust the spice level by adding more or less chili powder and fresh chilies based on who you're feeding.
 Save to Pinterest
 These bhaji turned what I thought was a risky kitchen experiment into something I make regularly now, and they've become the thing people actually ask me to bring to gatherings. That's the real magic of a good recipe—when it stops being about following instructions and starts being about making something with your own hands that genuinely makes people happy.
Recipe Questions
- → What makes these onion fritters crispy?
The combination of gram and rice flours creates a crisp coating, while air frying ensures a golden, crunchy texture without deep frying.
- → Can green chilies be omitted?
Yes, green chilies are optional and can be adjusted to suit your spice preference or left out for a milder taste.
- → Is it necessary to preheat the air fryer?
Preheating the air fryer to 180°C ensures even cooking and helps achieve the desired crispiness.
- → Can I add other vegetables to the batter?
Yes, finely chopped spinach or shredded carrot can be added for extra crunch and nutrition.
- → What dipping sauces pair well with these fritters?
Mint chutney and tamarind sauce complement the spices and add refreshing or tangy elements to the dish.