 Save to Pinterest
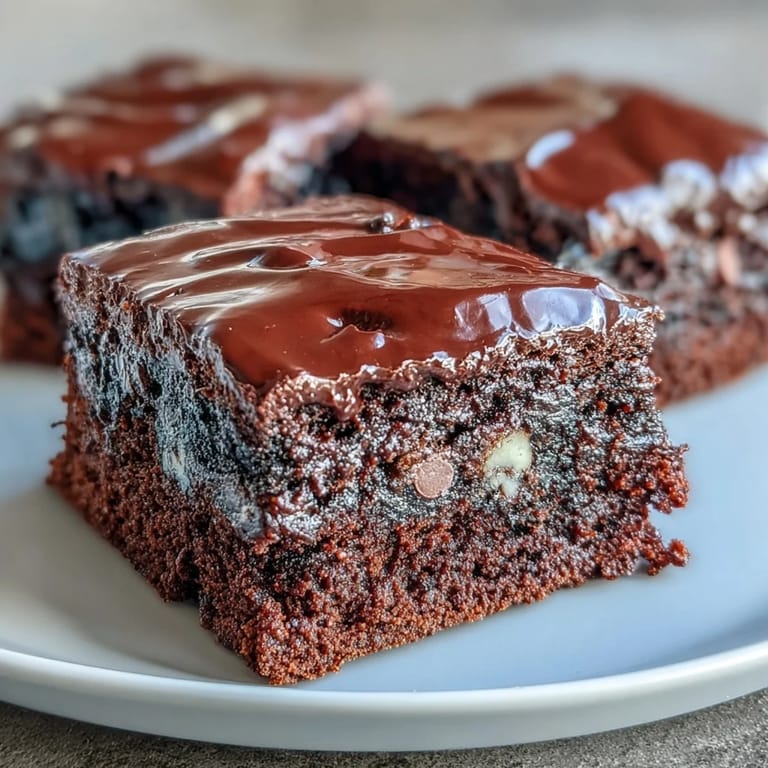
 My sourdough starter was sitting on the counter, looking neglected as usual, when I realized I had a bowl of discard that needed rescuing. Instead of tossing it, I wondered what would happen if I folded it into brownies—tangy fermentation meeting deep chocolate seemed wild, but something about it felt right. That first batch came out of the oven with this unexpected chewiness that had nothing to do with technique and everything to do with that funky starter living its best life in the batter. My partner took one bite and asked why I'd been making ordinary brownies all these years.
Last spring, I brought these to a book club where everyone was mid-dessert conversation, and someone asked what made them different. When I mentioned the sourdough, there was this pause—then suddenly everyone was asking for the recipe, debating whether it was psychological or real. A friend who bakes sourdough professionally took one home and texted me later that she was canceling her usual brownie recipe forever, which felt like winning an award I didn't expect.
Ingredients
- Bittersweet chocolate: The foundation—use something between 60 and 72 percent cocoa, because too high and it fights with the sourdough tang, too low and you lose that grown-up edge.
- Milk chocolate: This isn't indulgence fluff; it smooths out the bittersweet and adds body without making things cloying.
- Unsweetened Dutch-process cocoa powder: Already alkalized, so it dissolves clean and adds depth that natural cocoa can't reach.
- Unsalted butter: Room temperature helps it melt evenly, and unsalted lets you control the salt yourself rather than guessing.
- Granulated and light brown sugar: The brown sugar brings molasses notes that make everything taste older, deeper, more intentional.
- Sourdough discard: Unfed and bubbly is what you want—it's the live cultures that create the texture, so don't use discard that's been sitting in the fridge for three weeks looking flat.
- Eggs at room temperature: They whisk into that thick, pale foam better when they're warm, which means the structure holds.
- All-purpose flour: Keep it measured lightly and avoid the urge to pack it down, or you'll end up with dense, tight brownies.
- Semi-sweet chocolate chips: These are your last-minute flavor insurance, so use the kind you actually like eating plain.
Tired of Takeout? 🥡
Get 10 meals you can make faster than delivery arrives. Seriously.
One email. No spam. Unsubscribe anytime.
Instructions
- Heat your oven and prepare:
- Set it to 350°F and line your pan with parchment, leaving edges hanging over—this is how you lift the whole thing out without it crumbling. The parchment isn't optional here; it's what separates success from a brownie that stays stuck to the pan forever.
- Melt the chocolate trio:
- Combine bittersweet, milk chocolate, cocoa powder, and butter in a bowl over simmering water or use the microwave method if you're watching the clock. Stir until you get a glossy, smooth texture with no grainy cocoa bits, then let it cool for a minute so it doesn't cook your eggs.
- Whisk sugar and eggs until thick:
- This step looks simple but matters—you're building air into the eggs so they carry the chocolate mixture without deflating. By the time you're done, it should look almost pale and mousse-like, which takes longer than you think.
- Fold in the sourdough:
- Stir the discard into the chocolate until it disappears completely and the mixture feels alive, almost frothy. This is where the sourdough character starts showing up, so don't skip whisking it smooth.
- Combine chocolate and egg mixtures:
- Gently fold the chocolate into the egg mixture rather than beating it—you want them combined, not deflated. Use a spatula and a light hand, turning the bowl more than you're stirring.
- Add flour and salt:
- Sift them in together, then fold with the spatula using as few strokes as possible; overdoing it here makes tough brownies. You're done when you don't see white flour streaks anymore, even if it feels slightly undermixed.
- Fold in chocolate chips:
- Distribute them evenly so every slice gets a surprise chocolate moment. This is the last gentle fold before batter meets pan.
- Pour and bake:
- Spread the batter into your prepared pan and smooth the top with the spatula, then slide it into the oven for 28 to 32 minutes. The edges should look set and matte while the center still has the slightest jiggle when you shake the pan—that's your signal to stop.
- Cool and rest:
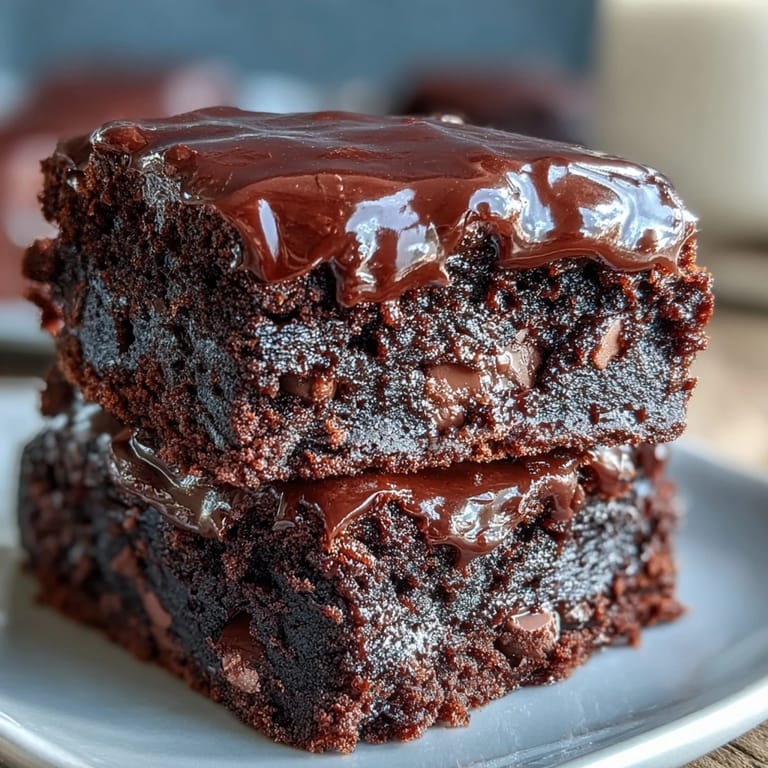
- Let them cool completely in the pan on a wire rack, then refrigerate for at least an hour if you can wait that long. This chilling period is when the sourdough magic really sets in, making them chewy rather than cakey.
 Save to Pinterest
 What I didn't expect was how these brownies became my quiet way of staying connected to sourdough people—the ones who understand that feeding a starter feels like caring for something alive, and that eventually all that care has to become something you share. These brownies proved that even the mistakes and byproducts get their moment.
The Sourdough Secret
Most brownie recipes ignore sourdough discard entirely, which is wild because it does something you can't replicate with leavening agents or extra eggs. The live cultures create a natural chewiness by breaking down starches differently, and the acidity adds a faint brightness that stops chocolate from feeling heavy. I learned this accidentally, and now every baker with a starter should know it: this is the answer to what to do with discard that actually makes sense.
Why Three Chocolates Matter
Using one chocolate is simpler, but it's also flat—three different kinds layering together create something that feels complex on your tongue without tasting confused. The bittersweet handles the depth, the milk chocolate adds roundness, and the semi-sweet chips punctuate every bite. I tried cutting corners once with just dark chocolate, and they were fine, but they tasted like a version of themselves that was trying too hard.
Storage and Serving
These brownies stay fresh in an airtight container for four days, though they rarely last that long in a house where people know about them. They're even better on day two when the flavors settle, and they freeze beautifully for up to three months if you wrap them individually. The cold from the fridge or freezer actually highlights the chewiness, making them taste like they were meant to be eaten straight from cool storage.
- Slice them with a hot, damp knife wiped clean between cuts if you want clean edges rather than crumbles.
- A scoop of vanilla ice cream on top turns these into something that feels like a restaurant dessert you made at home.
- If you're feeling fancy, dust the top with a tiny bit of fleur de sel right before serving to make all three chocolates sing.
 Save to Pinterest
 These brownies proved that sometimes the best recipes come from trying to solve a problem—in this case, a bowl of starter I didn't want to waste. They're a reminder that sourdough belongs in more places than just bread.
Recipe Questions
- → What does sourdough discard add to the brownies?
It contributes a subtle tang and enhances chewiness, creating a moist but firm texture without overpowering the chocolate flavor.
- → Can I substitute dark chocolate for bittersweet?
Yes, dark chocolate works well as a substitute and offers a slightly different depth of cocoa flavor.
- → How do I ensure the brownies stay fudgy?
Bake until the edges are set but the center remains slightly wobbly. Overbaking reduces moisture and makes them cakier.
- → Are nuts a good addition for texture?
Adding chopped toasted walnuts or pecans provides a pleasant crunch that contrasts nicely with the fudgy base.
- → Is chilling necessary before slicing?
While optional, chilling for at least an hour helps the brownies firm up and improves sliceability without crumbling.