 Save to Pinterest
 I discovered these protein cheesecake cups on a Tuesday afternoon when I was staring into my fridge, tired of the same protein shakes but craving something that felt like dessert. My friend had just texted me about her post-workout snack struggles, and I thought, why not make something creamy and indulgent that actually fuels you? Within minutes, I'd mixed together a simple base and a cloud-like filling, and by evening, I had six perfect little cups chilling in my fridge. The moment I pulled one out and took that first bite, I realized I'd stumbled onto something that made healthy eating feel less like a chore and more like a treat I actually wanted to eat.
I made a batch for my sister's gym friends during a casual Sunday hangout, and I'd never seen people get so excited about a dessert that happened to be high in protein. One of them asked if I'd bought them from a fancy health food place, which made me laugh—they're honestly that good, and that easy. Watching them go from skeptical to impressed in one bite told me everything I needed to know about this recipe's staying power.
Ingredients
- Oat flour or almond flour (100 g / 1 cup): The oat flour creates a heartier, more substantial base that holds together beautifully, while almond flour leans into a nuttier flavor—both work equally well, so choose based on your texture preference.
- Almond butter or peanut butter (40 g / 1/4 cup): This is what binds everything together and adds richness; it's the secret to a base that stays firm without feeling dense.
- Honey or maple syrup (2 tbsp): Just enough sweetness to make the base taste intentional without overpowering the filling that comes next.
- Salt (pinch): A tiny bit amplifies all the flavors and prevents the filling from tasting one-dimensional.
- Reduced-fat cream cheese (225 g / 8 oz), softened: Room temperature cream cheese blends like butter; cold cream cheese means lumps, so plan ahead by pulling it from the fridge thirty minutes before mixing.
- Greek yogurt (200 g / 3/4 cup), plain non-fat or low-fat: This is what keeps these cups light and protein-packed without sacrificing that creamy texture you're after.
- Vanilla whey protein powder (60 g / 2 scoops): Choose a quality powder you actually enjoy drinking, because any aftertaste will show up here.
- Honey or maple syrup (2 tbsp): Sweetens the filling while keeping it smooth and spreadable.
- Vanilla extract (1 tsp): The backbone of the flavor profile—don't skip it or substitute it with imitation unless you're prepared for a noticeable difference.
- Lemon zest (from 1 lemon, optional): If you add this, it cuts through the richness with brightness that makes the whole thing feel fresher and lighter.
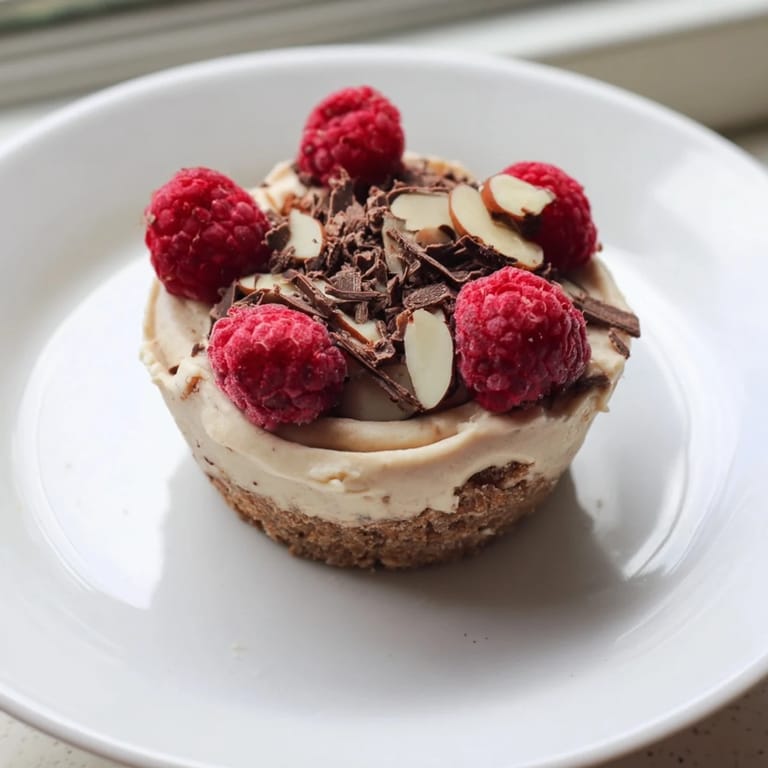
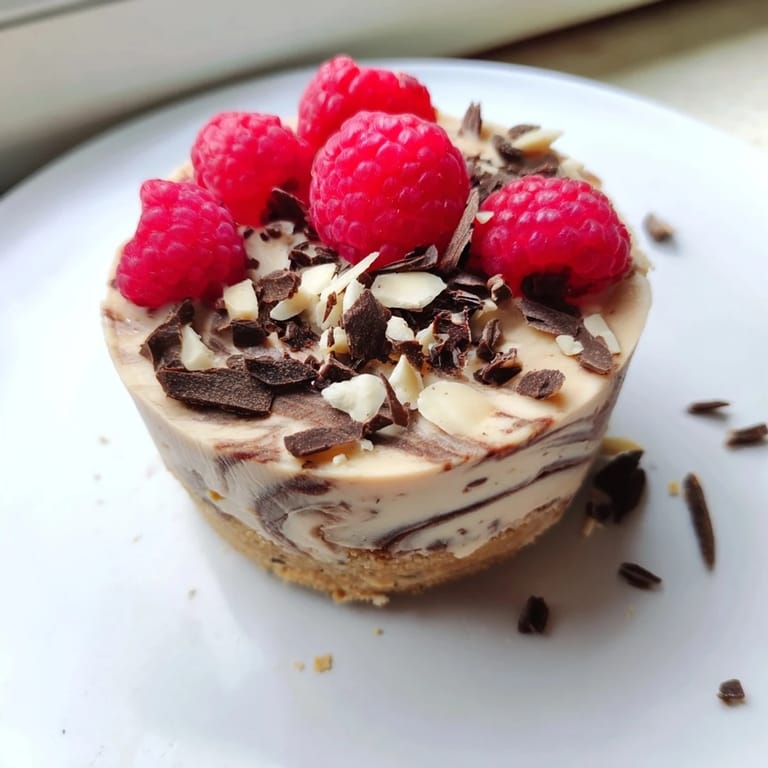
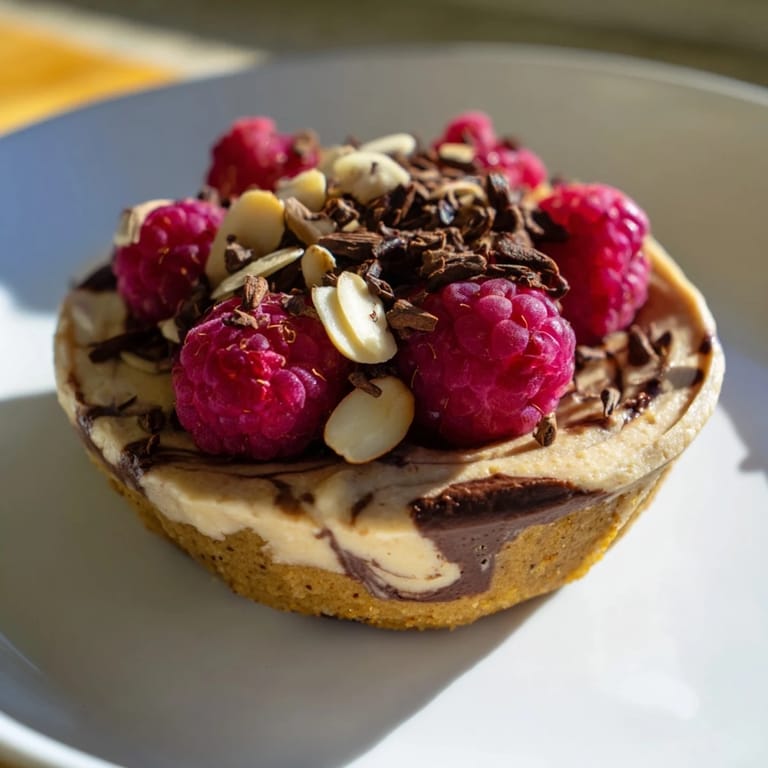
- Fresh berries, chopped nuts, dark chocolate shavings (for topping): These aren't just decoration—they add texture and visual appeal that makes you want to eat the whole thing right away.
Tired of Takeout? 🥡
Get 10 meals you can make faster than delivery arrives. Seriously.
One email. No spam. Unsubscribe anytime.
Instructions
- Build Your Base:
- Combine oat flour, almond butter, honey, and salt in a bowl and mix until the texture resembles wet sand that holds together when squeezed. You're aiming for a crumbly dough that's moist enough to bind but still has texture—don't overwork it or it'll turn into paste.
- Press and Set:
- Divide the base mixture among six muffin liners and press down firmly with the back of a spoon or your fingers, creating an even layer about 1/4 inch thick. The firmer you press, the more structure you'll have to support the filling.
- Whip the Filling:
- Beat softened cream cheese until completely smooth and fluffy, then fold in Greek yogurt, protein powder, honey, vanilla, and lemon zest if using. Mix until the texture is silky and uniform with no lumps of cream cheese or dry pockets of powder—this is where patience matters.
- Layer It Up:
- Spoon the cheesecake mixture generously over each base, smoothing the tops with a spatula for a clean, professional finish. If you prefer rustic texture, skip the smoothing and leave it naturally dimensional.
- Add Toppings:
- Scatter berries, nuts, or chocolate shavings over each cup right before chilling so they stay fresh and don't sink into the filling or get soggy.
- Chill and Set:
- Refrigerate for at least two hours, though overnight is even better—the longer they sit, the firmer and more sliceable they become. You'll know they're ready when they feel firm to the touch but still have that creamy give.
- Release and Serve:
- Once fully chilled, peel away the muffin liners and arrange on a plate or platter. They keep in the fridge for up to five days, making them perfect for meal prep or impromptu desserts.
 Save to Pinterest
 The first time I unmolded these cups at my kitchen counter without them falling apart, I felt genuinely proud in a way that surprised me—like I'd cracked some culinary code. What started as an experiment became proof that nutritious food doesn't have to taste like punishment or feel complicated to make.
Customizing Your Cups
The beauty of this recipe is how endlessly adaptable it is to what you have on hand and what you're craving. I've made them with peanut butter instead of almond butter on days when that's what was in the pantry, swapped vanilla protein for chocolate, and even experimented with adding a tiny splash of espresso to the filling for a mocha twist. The structure stays solid, the flavor profile shifts, and suddenly you're not making the same recipe twice.
Storage and Make-Ahead Magic
These cups are a game-changer for meal prep because they're one of those rare recipes that actually tastes better after sitting in the fridge for a day or two—the flavors meld, the texture becomes creamier, and you can literally grab one on your way out the door. I've made a triple batch on Sunday and had protein-packed dessert ready for the entire week, which means fewer 3 p.m. snack decisions and more consistent nutrition without effort.
Flavor Variations Worth Trying
Once you nail the basic formula, the variations practically write themselves. Swap vanilla protein for chocolate and add crushed Oreos to the base for a cookies-and-cream situation, or use strawberry protein powder and top with fresh strawberries and a tiny drizzle of dark chocolate. I've even made a salted caramel version by adding a pinch of sea salt and swapping vanilla for caramel extract, creating something that feels fancy enough to serve at dinner parties but honest enough to eat at your desk on a Tuesday.
- Try cookie butter mixed into the base for a vaguely European-inspired twist that sounds fancier than it actually is.
- A tiny pinch of cinnamon in both the base and filling adds warmth without announcing itself loudly.
- If you're making these for guests who don't prioritize protein, reduce the powder to one scoop and increase the yogurt slightly—they'll still be nutritious and taste purely like indulgent cheesecake.
 Save to Pinterest
 These cheesecake cups proved to me that healthy eating doesn't require sacrifice or compromise. They're the kind of recipe that makes you feel smart and nourished at the exact same moment, which is honestly all any of us want from dessert.
Recipe Questions
- → Can I make these gluten-free?
Yes, substitute oat flour with almond flour and ensure all ingredients are gluten-free certified.
- → What can I use instead of cream cheese?
Dairy-free cream cheese alternatives work well for a vegan or lactose-free option.
- → How long should the cups chill?
Chill for at least 2 hours to allow the filling to set firmly.
- → Can I add different toppings?
Fresh berries, chopped nuts, or dark chocolate shavings are great; customize to your preference.
- → Is it possible to sweeten differently?
Yes, replace honey or maple syrup with your preferred natural sweetener to suit taste.