 Save to Pinterest
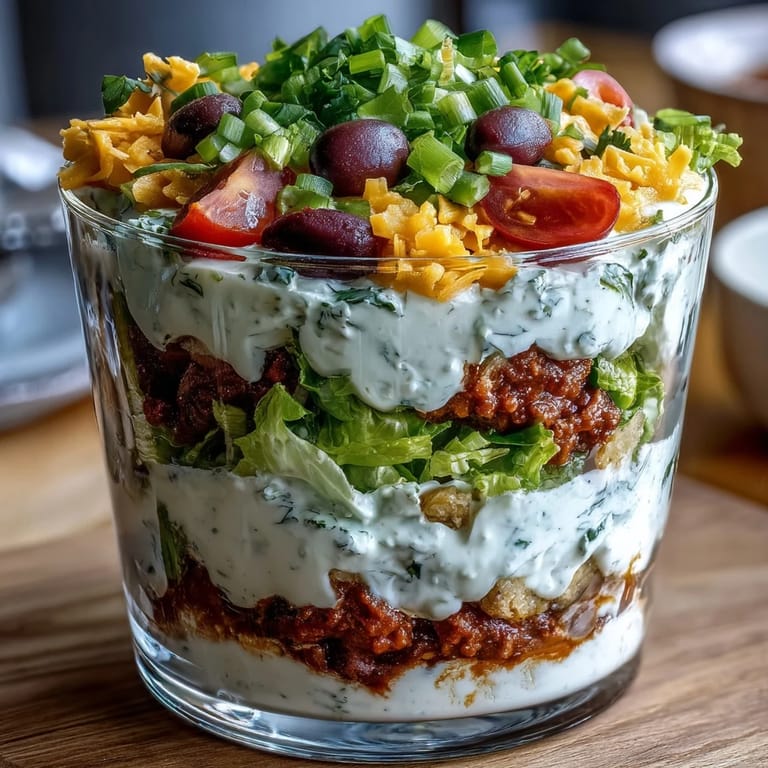
 My neighbor handed me one of these cups at a backyard gathering last summer, and I remember thinking how smart it was—all those layers of flavor you'd normally smear onto a chip, but instead perfectly stacked and ready to grab. The cream cheese and sour cream base was cool and tangy, the lettuce stayed crisp under the cheese, and honestly, I went back for three more before even realizing it. That's when I knew I had to figure out how to make them myself, because there's something about eating from a cup that makes a party feel less like standing around and more like actually enjoying yourself.
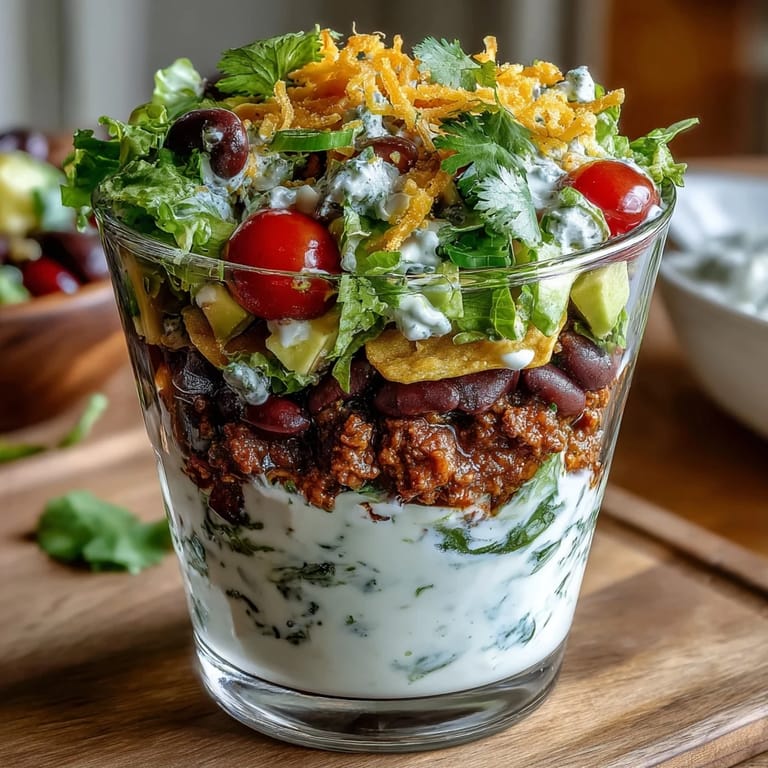
I made these for Cinco de Mayo last year, and my daughter's friend said they tasted like someone had compressed an entire taco into a single perfect bite. That compliment stuck with me, because it's exactly what these are—all the best parts, none of the mess, and you can actually taste each layer instead of everything getting jumbled together on a chip.
Ingredients
- Refried beans (1 can, 16 oz): This is your foundation, and it needs to stay at the bottom without getting watery, so make sure you drain any excess liquid that pools on top before scooping.
- Sour cream (1 cup) and cream cheese (4 oz): The sour cream gives tang while the cream cheese makes everything creamy and smooth, so don't skip blending them together until there are no lumps.
- Taco seasoning (1 packet, 1 oz): This little packet carries all the flavor, so mix it in thoroughly and don't be shy about tasting as you go.
- Shredded lettuce (1 cup): Use the crispiest lettuce you can find, and keep it refrigerated right up until the moment you layer it so it doesn't wilt.
- Cherry tomatoes (1 cup, diced): Fresh and bright, these sit right on top of the cream layer where they look beautiful and add a burst of juice with every bite.
- Black olives (1/2 cup, sliced): Their saltiness cuts through the richness, so don't treat them as optional even if you think you're not an olive person.
- Shredded cheddar cheese (1 cup): The sharp flavor ties everything together, and freshly shredded melts better than pre-shredded, though honestly either works fine.
- Green onions (1/4 cup, chopped): These add a fresh onion bite at the very end, so keep them separate and sprinkle them on just before serving.
- Salsa (1/4 cup, optional): A small spoonful on top adds moisture and extra flavor, but save it for last so it doesn't seep down and make everything soggy.
- Tortilla chips (for serving): Use sturdy chips that won't break under the weight of the dip, because there's nothing worse than a chip that crumbles mid-scoop.
Tired of Takeout? 🥡
Get 10 meals you can make faster than delivery arrives. Seriously.
One email. No spam. Unsubscribe anytime.
Instructions
- Mix the creamy base:
- In a bowl, blend the sour cream, softened cream cheese, and taco seasoning together until smooth with no streaks of cream cheese visible. Take your time here because lumps in the base layer will throw off the whole texture.
- Prepare your cups:
- Set out eight small clear cups (8 oz size is perfect) and line them up so you can see what you're doing. Clear cups are your secret weapon because people can see those gorgeous layers and it makes the whole thing look more impressive than it actually is.
- Layer the beans:
- Spoon about 2 tablespoons of refried beans into each cup and spread it evenly across the bottom using the back of your spoon. This layer should be compact but not smashed, giving you a solid foundation that won't shift when you add the next layer.
- Add the creamy layer:
- Dollop about 2 tablespoons of the cream cheese mixture on top of the beans and smooth it out gently so it covers everything evenly. This layer should look neat, not messy, because it's going to hold all the vegetables on top.
- Layer the vegetables:
- Sprinkle a small handful of shredded lettuce on top of the cream layer, then scatter the diced tomatoes and sliced olives over that. The vegetables will nestle into the cream a little bit, which is fine—it actually helps them stay in place.
- Top with cheese and garnish:
- Finish each cup with a generous sprinkle of shredded cheddar cheese and a pinch of chopped green onions. At this point, your cups should be visually stunning with distinct layers of color.
- Add salsa if desired:
- If you're using salsa, add just a tiny spoonful on the very top of each cup right before serving. Too much salsa will drip down and make the lettuce soggy, so restrain yourself even though you'll be tempted.
- Serve immediately:
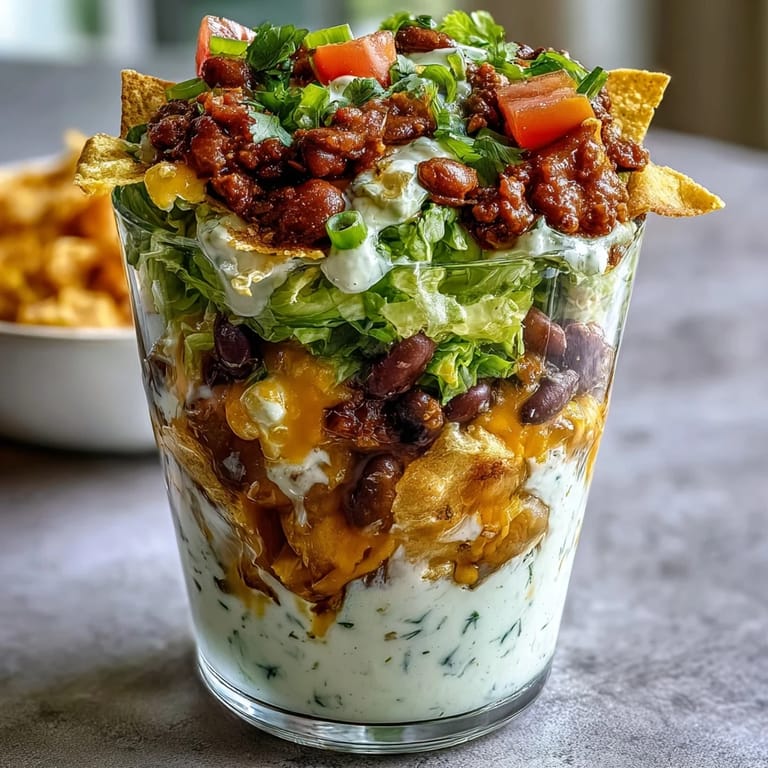
- Arrange the cups on a platter with tortilla chips nearby and watch people light up when they see them. Serve right away so everything stays fresh and the layers stay distinct.
 Save to Pinterest
 My partner called these "party magic in a cup," and I think that's exactly right. Somehow, serving food in clear cups instead of a bowl makes people feel special, like they're getting something custom-made just for them, even though you made all eight at the same time.
The Secret of Clear Cups
The visual impact of seeing all those layers stacked up is almost more important than the taste, which is saying something because these taste incredible. When you use clear plastic or glass cups, people can actually see the engineering of what you've done—the beans, the creamy base, the vegetables peeking through, the cheese on top. It's the same flavors as a regular bean dip, but somehow presenting it this way makes it feel fancier and more intentional.
Make-Ahead Magic
Here's the thing about these cups that makes them perfect for entertaining: you can assemble the bottom three layers (beans, cream cheese mixture, and cheese) up to four hours ahead and refrigerate them covered. Then about thirty minutes before guests arrive, add the lettuce, tomatoes, olives, green onions, and salsa. This strategy means you're not frantically assembling things while people are arriving, and everything stays fresh and crisp instead of getting soggy from sitting.
Ways to Make Them Your Own
The beauty of this recipe is that it's a starting point, not a strict rulebook. Some people add jalapeños between the cream layer and the lettuce for heat, others use spicy refried beans or swap in Greek yogurt for a lighter version. I've even seen people add a layer of black beans or corn, or swap the cheddar for Mexican blend cheese and add cilantro instead of green onions.
- For extra heat, slice fresh jalapeños and layer them in before the vegetables, or use spicy taco seasoning in the cream base.
- Try Greek yogurt mixed with the cream cheese for a tangier, lighter bite that cuts through the richness of the beans.
- Keep extra toppings nearby at the party so people can customize—salsa, hot sauce, more cheese, or sour cream on the side.
 Save to Pinterest
 These cups have become my go-to appetizer because they're simple enough that I'm not stressed, but impressive enough that people remember them. Once you make them once, you'll understand why—they're really just about layering things you already know how to do, then letting the clear cup do the heavy lifting on making them look amazing.
Recipe Questions
- → Can I make these taco dip cups ahead?
Yes, you can assemble the creamy and bean layers up to 4 hours in advance. Add fresh vegetables and cheese right before serving to keep toppings crisp.
- → What can I use instead of sour cream?
Greek yogurt works well for a lighter and tangy alternative in the creamy layer.
- → Are these suitable for vegetarians?
Yes, if you use vegetarian refried beans, these cups are vegetarian-friendly.
- → How can I make the dip spicier?
Adding sliced jalapeños or using spicy taco seasoning will increase the heat level.
- → What serving size do these cups have?
Each cup holds about 8 ounces (240 ml) and yields 8 individual cups.