 Save to Pinterest
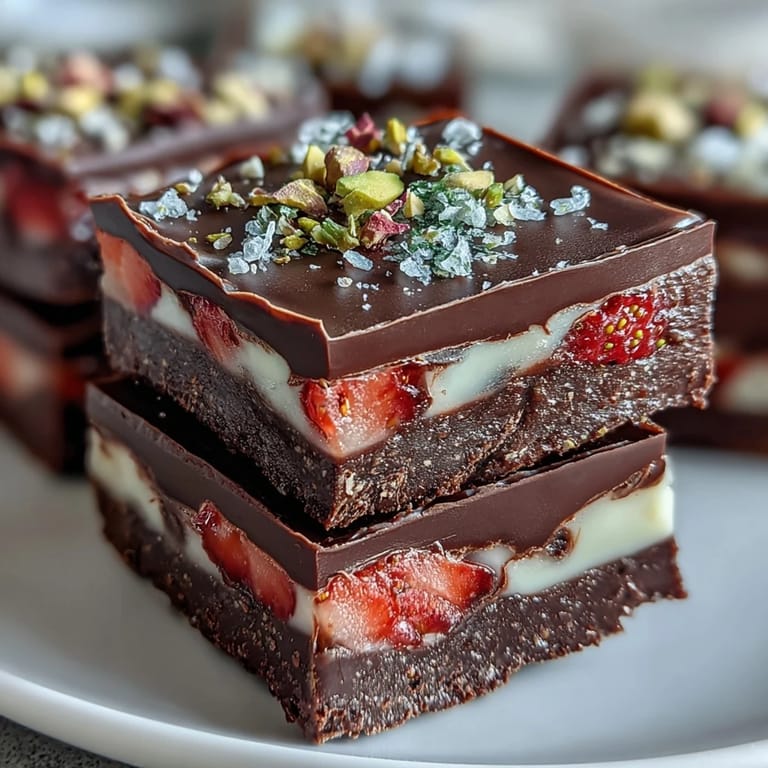
 The first time I saw this Dubai chocolate bark trend flooding my feed, I almost scrolled past it—until my friend Sarah sent me a photo of hers with a message that said "this looks impossible but tastes like luxury." Twenty minutes later, I had melted chocolate on my stovetop and was absolutely convinced I'd mess it up. Turns out, there's something deeply satisfying about layering chocolate, fruit, and flowers onto a sheet and watching it transform into something that looks like it belongs in a fancy dessert case. It became my go-to when I needed to impress without the stress.
I made this for my book club last month, and honestly, it became the conversation starter before anyone even opened a book. One person took a photo before tasting it, another asked if I'd bought it from a fancy pastry shop, and then my usually quiet neighbor asked for the recipe on a napkin. That's when I realized this bark isn't just dessert—it's permission to do something beautiful in your own kitchen and share it without apology.
Ingredients
- Dark chocolate (200 g, at least 60% cocoa), chopped: The backbone of this whole thing—it needs enough cocoa to stand up to the sweetness of the white chocolate and the freshness of the strawberries, so don't skimp on quality here.
- White chocolate (200 g), chopped: This is where the visual magic happens with those gorgeous swirls, and it adds a creamy sweetness that balances the intensity of the dark layer.
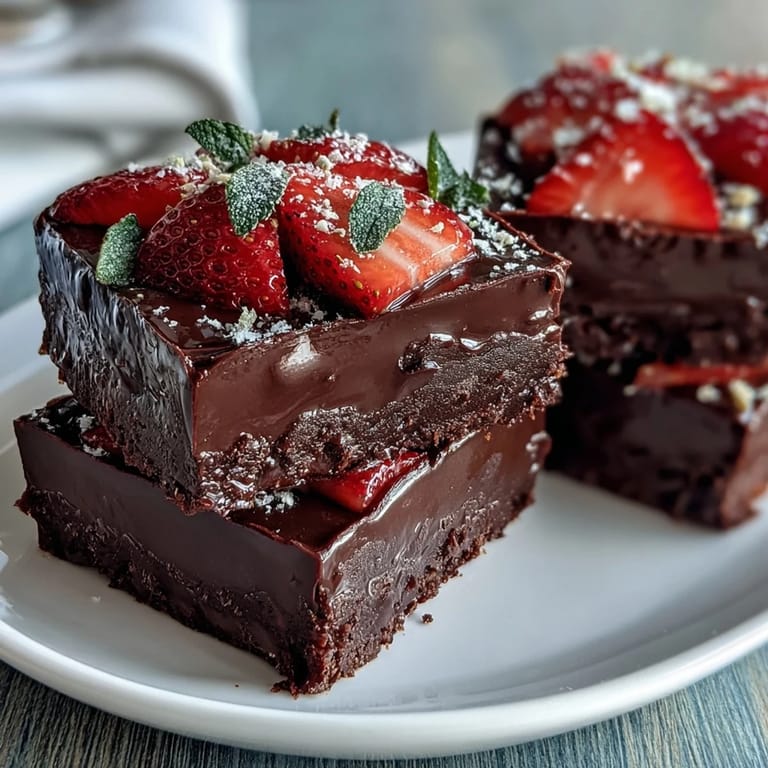
- Fresh strawberries (200 g), hulled and thinly sliced: Pat them completely dry with paper towels before using, or they'll release moisture and make your chocolate weep—I learned this the hard way.
- Pistachios (50 g), roughly chopped: The earthy, slightly salty crunch is what keeps this from being purely sweet, plus they add this beautiful green color that photographs beautifully.
- Dried edible rose petals (2 tbsp): They look delicate but pack a subtle floral note that ties this whole Middle Eastern-inspired vibe together—buy from a reliable source to ensure they're actually food-safe.
- Freeze-dried strawberries (1 tbsp, optional): This is the secret weapon for extra crunch and concentrated berry flavor without adding moisture.
- Edible gold leaf (1 tbsp, optional): Completely optional, but if you're going for that luxe look, it's worth the small investment.
Tired of Takeout? 🥡
Get 10 meals you can make faster than delivery arrives. Seriously.
One email. No spam. Unsubscribe anytime.
Instructions
- Set up your station:
- Line a large baking sheet with parchment paper and have all your toppings prepped and within arm's reach—sliced strawberries dried on paper towels, pistachios chopped, rose petals in a small bowl. When you're working with melted chocolate, there's no time to hunt for things.
- Melt the dark chocolate:
- Use a double boiler if you have the patience (it's gentler), or go the microwave route in 20-second bursts, stirring between each one—this prevents that grainy, overcooked texture. You'll know it's ready when it's smooth and glossy.
- Create your chocolate base:
- Pour the melted dark chocolate onto the parchment and spread it into a thin, even rectangle about 1/4-inch thick using a spatula. Work quickly but don't stress about perfection—the toppings will hide any uneven spots.
- Melt and swirl the white chocolate:
- Melt your white chocolate using the same method, then drizzle or dollop it over the dark chocolate base in a loose pattern. Grab a skewer or toothpick and drag it through the layers to create those Instagram-worthy marbled effects—trust your instincts here, there's no wrong way to do it.
- Top while the chocolate is still soft:
- Scatter your sliced strawberries evenly across the warm chocolate, pressing them down gently so they stick. The chocolate still being slightly warm helps everything adhere without sliding around.
- Layer on the finishing touches:
- Sprinkle the chopped pistachios, rose petals, and freeze-dried strawberries across the surface while the chocolate is still soft enough to hold them in place. If you're using gold leaf, apply it last with clean tweezers or by carefully pressing it down with the side of a clean knife.
- Chill until set:
- Pop the tray into the refrigerator for 45 minutes—don't skip this step, as it's what gives you that satisfying snap when you break the bark into shards. You'll know it's ready when it's completely firm and no longer gives when you gently press it.
- Break and store:
- Once set, use your hands or a sharp knife to break the bark into uneven, rustic shards—they look better that way anyway. Keep them in an airtight container in the fridge for up to 3 days, though honestly, they rarely last that long.
 Save to Pinterest
 There's a moment when you pull this bark out of the fridge and hear that satisfying snap as you break the first shard that feels like a small victory. It's proof that beautiful things don't need to be complicated, and sometimes the best desserts are the ones that look like you spent hours on them when really, you just knew where to find the magic.
The Art of Chocolate Tempering
Technically, tempering your chocolate would give you an even glossier finish and a more professional snap, but honestly, this recipe works beautifully without it—the refrigeration does most of the heavy lifting. If you do want to get fancy, look up proper tempering techniques, but know that the double boiler method I've described will get you 90% of the way there without the extra fuss. The magic here is really in the toppings and the visual contrast, not in achieving chocolatier-level technique.
Playing with Flavors and Variations
Once you nail the basic version, this bark becomes your blank canvas. I've made versions with dried cranberries instead of freeze-dried strawberries, swapped in chopped hazelnuts for pistachios, and even drizzled in a hint of matcha for an earthy twist. The rose petals are wonderfully subtle, but if you're not into florals, you could use crushed freeze-dried raspberries or a sprinkle of sea salt for contrast instead. The framework stays the same—it's just about playing with what speaks to your palate.
Serving and Storage Secrets
This bark is best served straight from the fridge when the chocolate is crisp and the strawberries are still fresh and cool. If you leave it at room temperature for too long, the white chocolate will start to sweat and the strawberries will soften, so keep it chilled until the moment you're ready to serve. It pairs beautifully with mint tea, sparkling water with fresh mint, or even a glass of something bubbly if you're leaning into the luxe vibe.
- Store in an airtight container with parchment between layers to prevent the pieces from sticking together.
- Make it the morning of an event so everything is at peak freshness and visual impact.
- If you're transporting it somewhere, keep it in a cool bag with an ice pack to ensure it stays set and beautiful.
 Save to Pinterest
 This bark became my favorite reminder that some of the most impressive things come together with the least effort. Make it, share it, and watch people's faces light up when they realize you actually made something this beautiful.
Recipe Questions
- → What type of chocolate works best for this bark?
Use good quality dark chocolate with at least 60% cocoa and smooth melting white chocolate for the best flavor and texture.
- → How can I ensure the chocolate sets properly?
Refrigerate the chocolate bark for at least 45 minutes until it's firm to the touch before breaking it into pieces.
- → Can I substitute the pistachios with other nuts?
Yes, almonds or hazelnuts work well as alternatives to pistachios and provide a different but delicious crunch.
- → Why dry the strawberries before topping?
Drying strawberries reduces moisture that can prevent the chocolate from setting evenly and helps maintain a crisp texture.
- → How should I store the finished bark?
Store in an airtight container in the refrigerator for up to three days to keep the flavors fresh and the chocolate firm.